Vehicles · A drawing idea for little artists
How to draw an easy & cute bicycle: two circles and a triangle frame
First draw two sets of concentric wheels.
For iPad & iPhone · In-app purchases
These 3 pictures show selected moments from the drawing. For every step in between and a guide on your canvas, get the full lesson in LittlePaper.
What you will learn
Practice this visual check: First compare the circular diameters of the two wheels, and then connect them with slender rods; the gap between the frame triangle and the wheel is retained.
Shapes and proportions
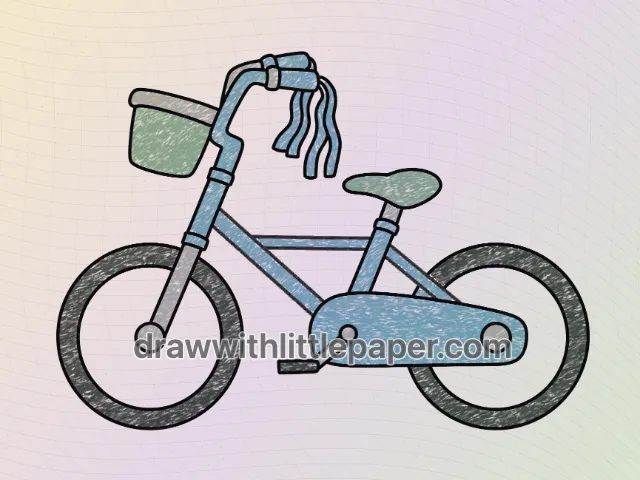
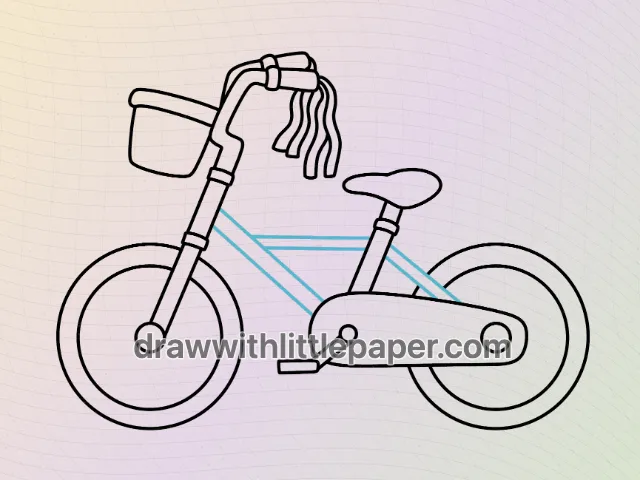
First draw two sets of concentric wheels. The chain cover is connected between the two wheels, the front wheel is connected to the handlebar diagonally, a seat cushion is added to the upper part of the rear, and then the triangle frame and the trolley basket are sealed with straight lines.
A common mistake
If the inside of the triangle frame is fully painted, or the radius difference between the two wheels is too large, the bike will appear heavy.
How to fix it
First compare the circular diameters of the two wheels, and then connect them with slender rods; the gap between the frame triangle and the wheel is retained.
First draw two sets of concentric wheels.
These three images are key-stage previews: the starting shape, the completed outline, and a new crayon color study. Follow the complete drawing sequence in LittlePaper. On paper, leave room around the first shape for the parts added later.
A few things to start with
Paper, pencil or black drawing pen, eraser, and crayons or colored pencils for color matching for this lesson.
A little peek at the drawing
1 / 3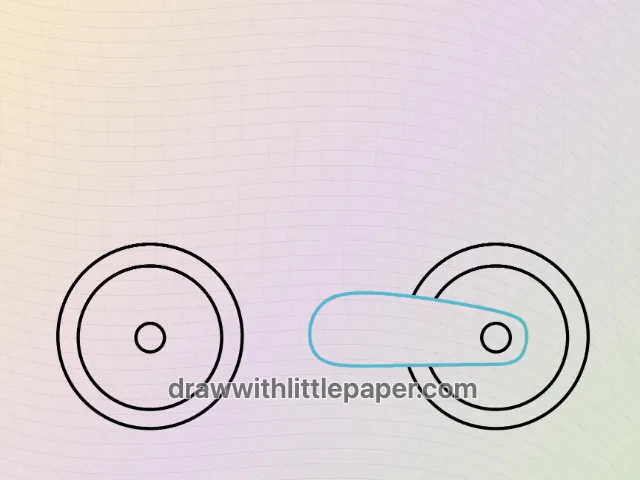
Selected stages · The complete drawing sequence is in the app.
Shapes, character & color
A look at the drawing stages.
Try the shape tips below on paper. When you’re ready to draw along with each small step, continue in LittlePaper.
- 01Selected stage
Position the basic shape first
First draw two sets of concentric wheels. Observe the position of the starting shape on the paper, leaving space for subsequent outlines and additional components.
Position the basic shape first · Preview image 1 of 3 - 02Selected stage
Connect profiles and arrange parts
Connect the chain cover between the two wheels, connect the front wheel to the handlebar diagonally, add a seat cushion above the rear, and then seal the triangular frame and trolley basket with straight lines. First compare the circular diameters of the two wheels, and then connect them with slender rods; the gap between the frame triangle and the wheel is retained.
Connect profiles and arrange parts · Preview image 2 of 3 - 03Selected stage
Select the color of the part to complete the crayon draft
The frame is unified blue, the basket and seat are green, the two tires are charcoal gray, and metallic silver gray; the gaps between the wheels and tripod are transparent. Apply the color first with light pressure, leaving the black outline, and then compare pairs of parts using the same color.
Select the color of the part to complete the crayon draft · Preview image 3 of 3
The next little step is yours
Like the idea?
Let’s make it together.
Open the “Easy & Cute Bicycle Drawing” drawing idea in LittlePaper for the complete sequence. Follow a guide, pause when you need, and add your own colors.
Download LittlePaper from the App Store, then open the drawing idea inside the app.
Every step, at your pace.
See the full drawing sequence. Pause, replay, and take another look whenever a shape needs practice.
A guide where you draw.
Trace on the canvas, then try your own lines with a finger or Apple Pencil on a compatible iPad.
Make it yours. Keep the making.
Add crayon color, replay your creation, and give your picture a home in a digital 3D book.