Holidays · A drawing idea for little artists
How to Draw a Mischievous Pumpkin Face
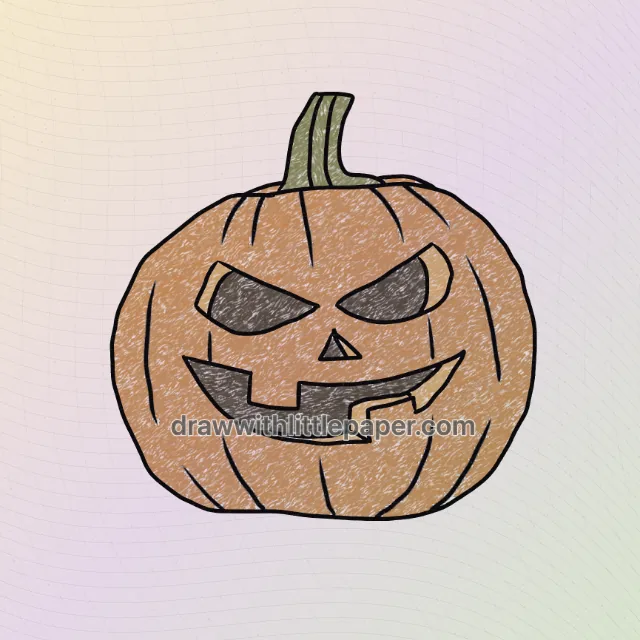
Draw a pumpkin face with slanted eyes, a tiny triangular nose and a jagged smile. Explore four selected stages and warm orange color.
For iPad & iPhone · In-app purchases
These 4 pictures show selected moments from the drawing. For every step in between and a guide on your canvas, get the full lesson in LittlePaper.
What you will learn
Change a pumpkin expression using eye tilt and a clearly shaped jagged mouth.
Shapes and proportions
Keep the eye tips angled toward the center and place the small triangular nose between them. Let the outer groove lines bend around the rounded pumpkin body.
A common mistake
If the eyes and mouth touch each other, the expression becomes a single dark patch and loses its shape.
How to fix it
Leave a clear strip of pumpkin between the nose and smile. Sketch the mouth as one wide opening before adding the square notches and corners.
This pumpkin face gets its mischievous expression from the inward tilt of the eyes and the uneven corners of the smile. The outline remains broad and rounded, while the curved groove lines help the face sit on a pumpkin rather than a flat circle.
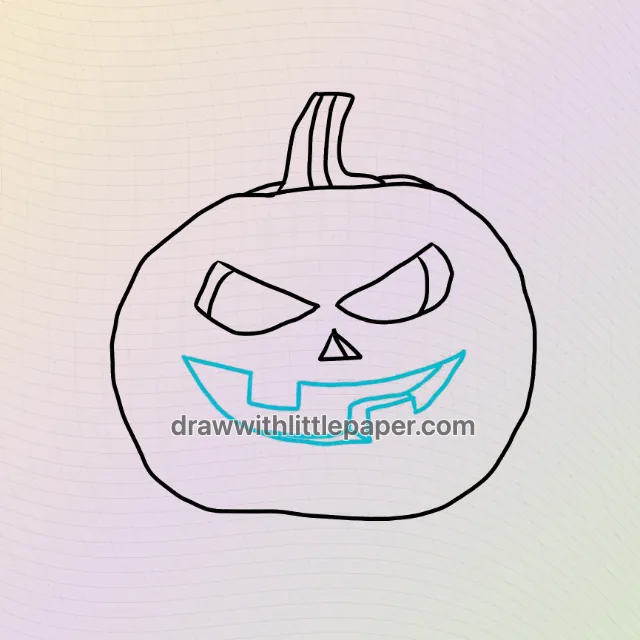
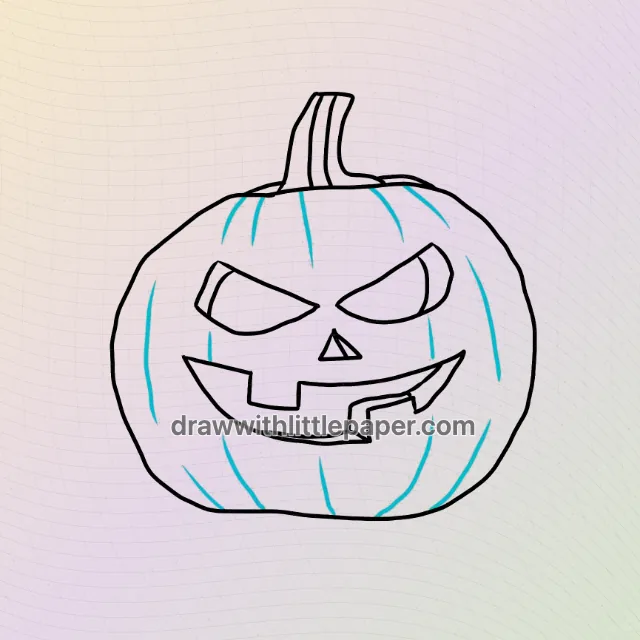
These four pictures are selected stages, not the complete sequence. The blue guide lines show additions at the illustrated stage. Use the shape notes on paper, or open the full drawing in LittlePaper to follow the smaller steps between these pictures.
A few things to start with
Paper, pencil, orange and green crayons, plus a dark brown or black drawing pencil.
A little peek at the drawing
1 / 4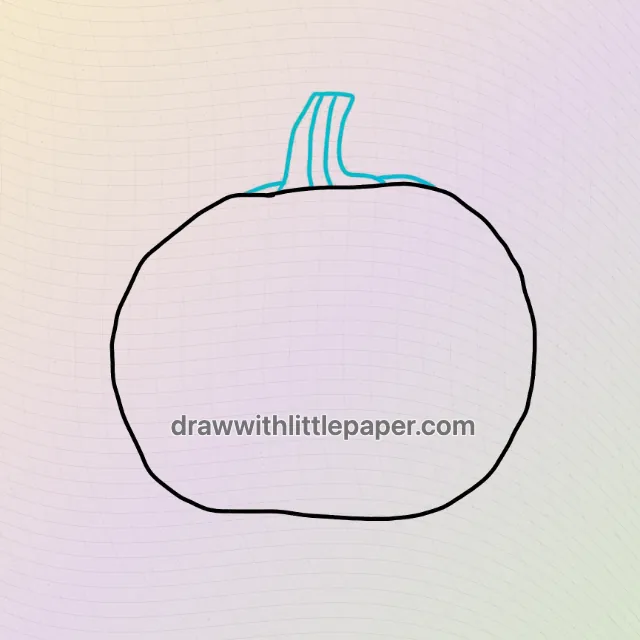
Selected stages · The complete drawing sequence is in the app.
Shapes, character & color
A look at the drawing stages.
Try the shape tips below on paper. When you’re ready to draw along with each small step, continue in LittlePaper.
- 01Selected stage
A broad pumpkin and stem
The first selected image shows a rounded pumpkin outline with a slightly bent stem. Keep the body wider than the stem and leave room inside for the face.
A broad pumpkin and stem · Preview image 1 of 4 - 02Selected stage
Slanted eyes and a jagged smile
This later stage includes inward-sloping eyes and a small nose, then adds a wide notched mouth. Leave spaces between the facial openings so they remain separate.
Slanted eyes and a jagged smile · Preview image 2 of 4 - 03Selected stage
Curved grooves around the face
The complete outline adds long curved grooves along the pumpkin sides. Let them follow the body shape instead of drawing straight vertical stripes through the expression.
Curved grooves around the face · Preview image 3 of 4 - 04Selected stage
Orange body and dark expression
Use warm orange on the pumpkin and dark brown inside the eyes and smile. A muted green stem provides a small contrasting accent above the face.
Orange body and dark expression · Preview image 4 of 4
A little practice goes a long way
Make room for your own ideas.
Keep the eyes and mouth dark, the pumpkin warm orange and the stem muted green. Use curved strokes near the sides to reinforce the rounded form.
The next little step is yours
Like the idea?
Let’s make it together.
Open the “Pumpkin Face Drawing” drawing idea in LittlePaper for the complete sequence. Follow a guide, pause when you need, and add your own colors.
Download LittlePaper from the App Store, then open the drawing idea inside the app.
Every step, at your pace.
See the full drawing sequence. Pause, replay, and take another look whenever a shape needs practice.
A guide where you draw.
Trace on the canvas, then try your own lines with a finger or Apple Pencil on a compatible iPad.
Make it yours. Keep the making.
Add crayon color, replay your creation, and give your picture a home in a digital 3D book.